Getting Started With MikroC Pro for PIC Compiler
This course focuses on the development of microcontroller based electronics systems using MikroC Pro for PIC Compiler
MikroC Pro for PIC is a powerful ,feature rich compiler for PIC microcontrollers from Mikroelekronika. It is easy to learn and easy to use with highly advance integrated development environment (IDE), hardware and software libraries ,documentations and a lot of examples.
Creating Your First Project
After installing MikroC Pro for PIC compiler, you can start a new project by following the few steps illustrated below with screenshots.
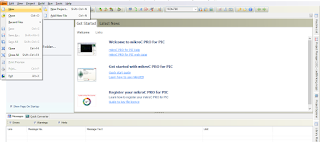
Start up MikroC Pro for PIC, Go to file menu and click on new project to start a new project wizard.
- Select Standalone project and click next. A new project wizard dialogue box will open , click next to start the wizard.
Determine where your project will be saved by clicking on the browse button. Select the PIC you are going to use from the Device Name drop down list and then select the oscillator frequency value in the Device Clock textbox
- Add project file to the project. You can also add project file later using project manager. for now click next.
- Select "include All" to include all libraries. click next
- Now you can write your first code.


0 Comments